Swing Gate Installation in Cupertino
Swing Gate Installation in Cupertino. See span limits and install steps. Get instant pricing in the configurator.
Richard Ryan
Founder of GateFrames. Helping homeowners choose the right driveway gate for their property.
Methodology note: cost guidance uses material, operator, and labor inputs with city-level adjustments. Always verify permits, utility clearances, and site constraints locally before installation.
Driveway Gate Installation in Cupertino
Plan your Cupertino gate project with fewer surprises: permit checkpoints, 2026 cost ranges, and installer scope questions that prevent change orders. Contemporary aluminum and steel gates are popular here. Or skip local labor - GateFrames ships nationwide for DIY install.
For more detail, see Installation in Cupertino and Bi-fold Installation in Cupertino.
Quick Summary
Gate planning in Cupertino - key takeaways:
- Step-by-step installation checklist
- Timeline and permit info
- Local permits and climate considerations
- Specifications and comparison
- Installer tips and next steps
Your Swing Installation Checklist - Step by Step
Two people. A few hours. Our step-by-step process. Steel and wood - no crane needed. You can do this.
Step 1: Measure where the gate will go
Measure twice. Write it down.
- We recommend a minimum of 2" clearance from any object the posts may be up against (e.g. house, shared neighbor fence, etc.)
- Mark the location where the posts will be installed with white paint
- ⚠️ Call 811 to have underground utilities located before you dig
Step 2: Dig the post holes
- Once the area has been cleared and there are no obstructions, dig the post holes
- We recommend a minimum 18" x 18" x 36" hole for each post (depth and size can increase depending on how solid the ground is)
- More concrete and larger hole size required for solo gates
- Use crushed base rock at the bottom of the hole for extra help with drainage and support for posts
Step 3: Find the absolute highest elevation in the gate's path
- Use a tape measure and a level to determine where the highest elevation is in the path of the gate (open, closed, and along the arch of the gate)
- Once the highest point along the path of the gate has been found, set the posts to that height and level across to the next post. Post height from highest elevation point provides a minimum of 2" clearance underneath the gate
- Top of post 61" plus highest elevation point for Arch Top Gates (the posts might be higher than this depending on the elevation point)
- Top of post 73" plus highest elevation point for Flat Top Gates (the posts might be higher than this depending on the elevation point)
Step 4: Screw in hinges once posts have been set
- Setting time is a minimum of 2-4 hrs for fast-drying concrete and 1-3 days for standard concrete
- With provided hinges, screw in the bottom hinge into the gate post (the hinge with only 1 nut)
- For recommended 4" hinge spacing, the center of the adjustable bolts should be 2⅝" from the post
- For the top hinge, remove the second nut
- Slide the hinge bolt through the top hole of the post and then reach inside and tighten the second nut so that you acquire the 2⅝" spacing as specified above
Step 5: Grease the hinges and insert the ball bearing
- We recommend using standard car grease (roughly 2 pumps if using a grease gun, or a generous amount if by hand)
- Using a screwdriver or your pinky, push in the ball bearing into the barrel of the hinge so that it stays lodged at the top (we recommend wearing rubber gloves)
Step 6: Hang and adjust the gate
- We recommend using 2 or more people for hanging the gate
- Carefully lift the gate and position it so that barrels of the gate are directly over the top of the ¾" adjustable bolts you inserted into the posts (Step 4)
- Lower the gate so that the barrels slide over the adjustable hinge bolts (might only slide on slightly at first)
- Once the gate is resting on the adjustable hinge bolts, swing the gate carefully back and forth so that the gate is seated fully (there may be a ⅛" gap between the welded washer on the adjustable hinge bolts and the bottom of the barrel)
- If the gate is not aligned, loosen the top bolt of the hinges and lift the gates in the center so that they match and are level (you can use a 2" wedge underneath the gate)
For more detail, see Cantilever Installation in Cupertino and Sliding Installation in Cupertino.
From Order to Operating: Your Steel Swing Gate Timeline in Cupertino
Most projects take 6–14 weeks. Here's what happens when.
| Phase | Duration | Details |
|---|---|---|
| Permit approval | 1-3 weeks | Santa Clara County permit; HOA design guidelines common in tech corridor neighborhoods. Plan accordingly. |
| Fabrication | 2-3 weeks | Custom fabrication after design approval |
| Shipping | 3-7 days | LTL freight; lift-gate trucks available for easy curbside unloading; kits can be unloaded piece by piece on the truck for lighter handling |
| Site preparation | 1-2 days | Excavation, concrete footings, utility trenching |
| Installation | 1-2 days | Gate hanging, operator mounting, electrical, commissioning |
Total project timeline: Typically 6–14 weeks from initial consultation to operating gate, depending on permit speed and fabrication complexity.
Cupertino scheduling tip: Cupertino HOAs often have pre-approved gate catalogs. Check before ordering custom designs. Labor costs 25-35% above national average.
For more detail, see Swing Automation in Cupertino and Swing Cost in Cupertino.
Permit Requirements in Cupertino
Permits are a pain. But skip them and you risk fines, removal, or voided insurance. Not worth it.
Santa Clara County permit; HOA design guidelines common in tech corridor neighborhoods
What you usually need (CA):
- Drawing showing where the gate goes
- Gate specs (material, size)
- Opener specs (safety rules for automatic gates)
- Electrical plan
- Emergency access plan (fire dept may need a key box)
How long: 1-4 weeks usually. Historic areas or coastal zones may add 2-6 weeks.
For more detail, see Swing Maintenance in Cupertino and Swing Safety in Cupertino.
Specs That Matter: Swing
Swing Gate At a Glance
| Min width | 8 ft (single panel) |
| Max width | 20 ft (two panels) |
| Space needed | Clear space for gate to swing - usually 10-12 ft |
| Best for | Flat driveways, Gentle slopes |
| Opener type | Arm opener or underground opener |
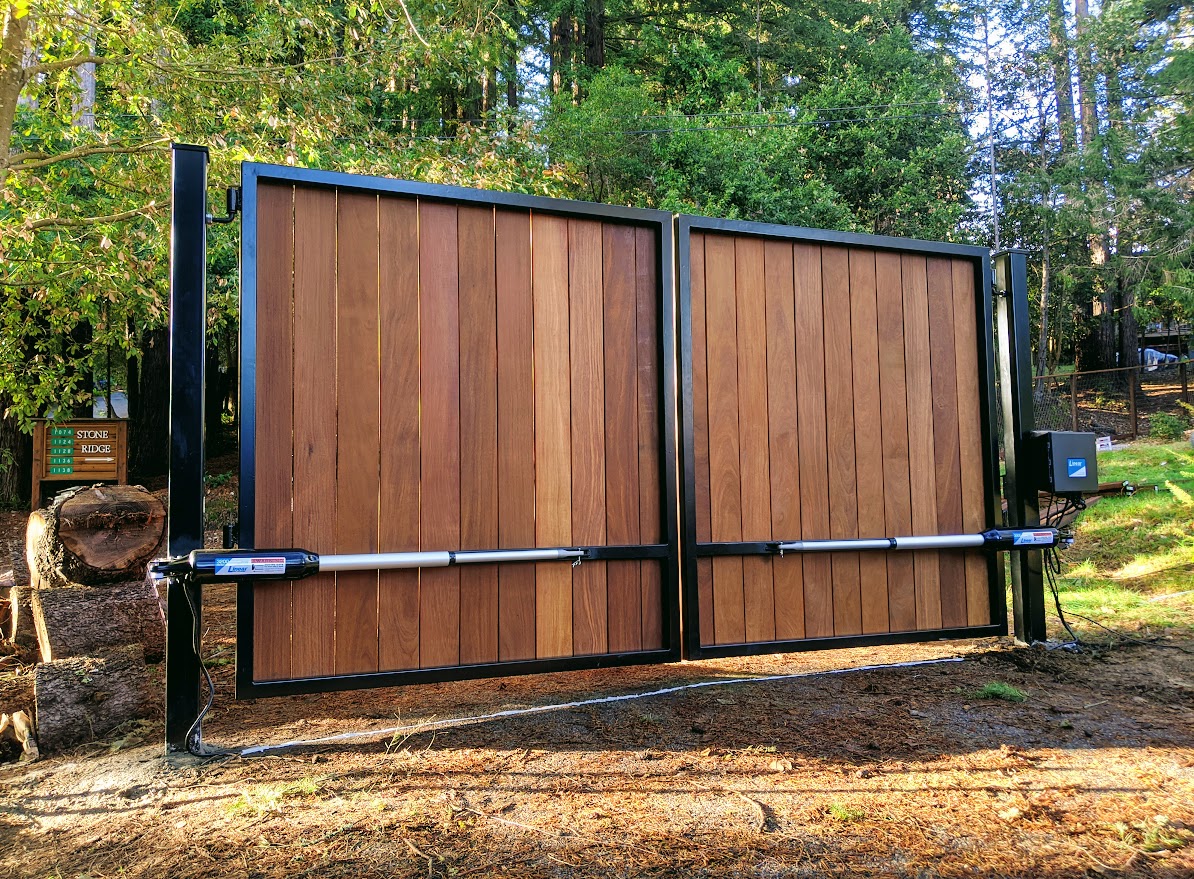
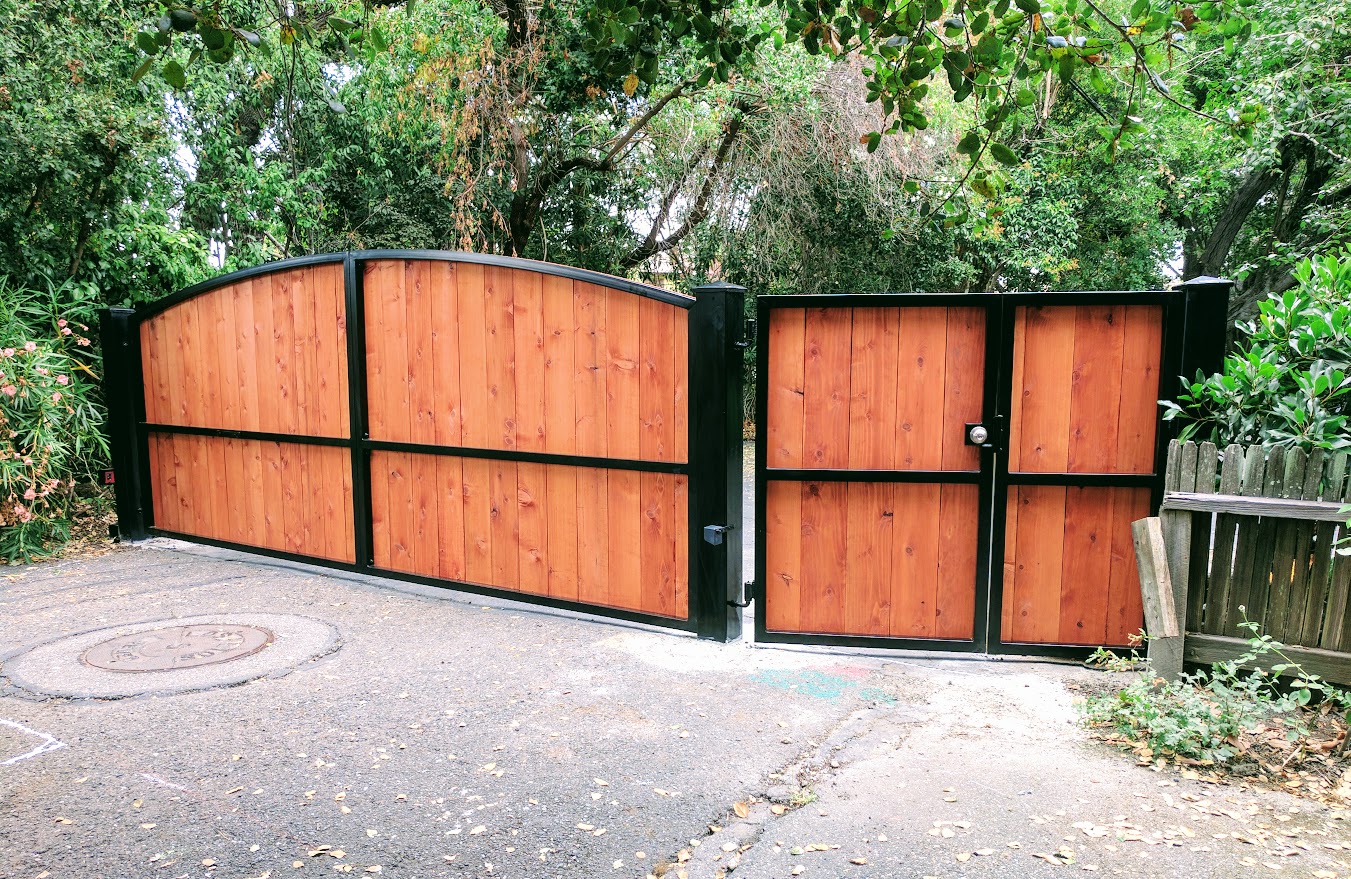
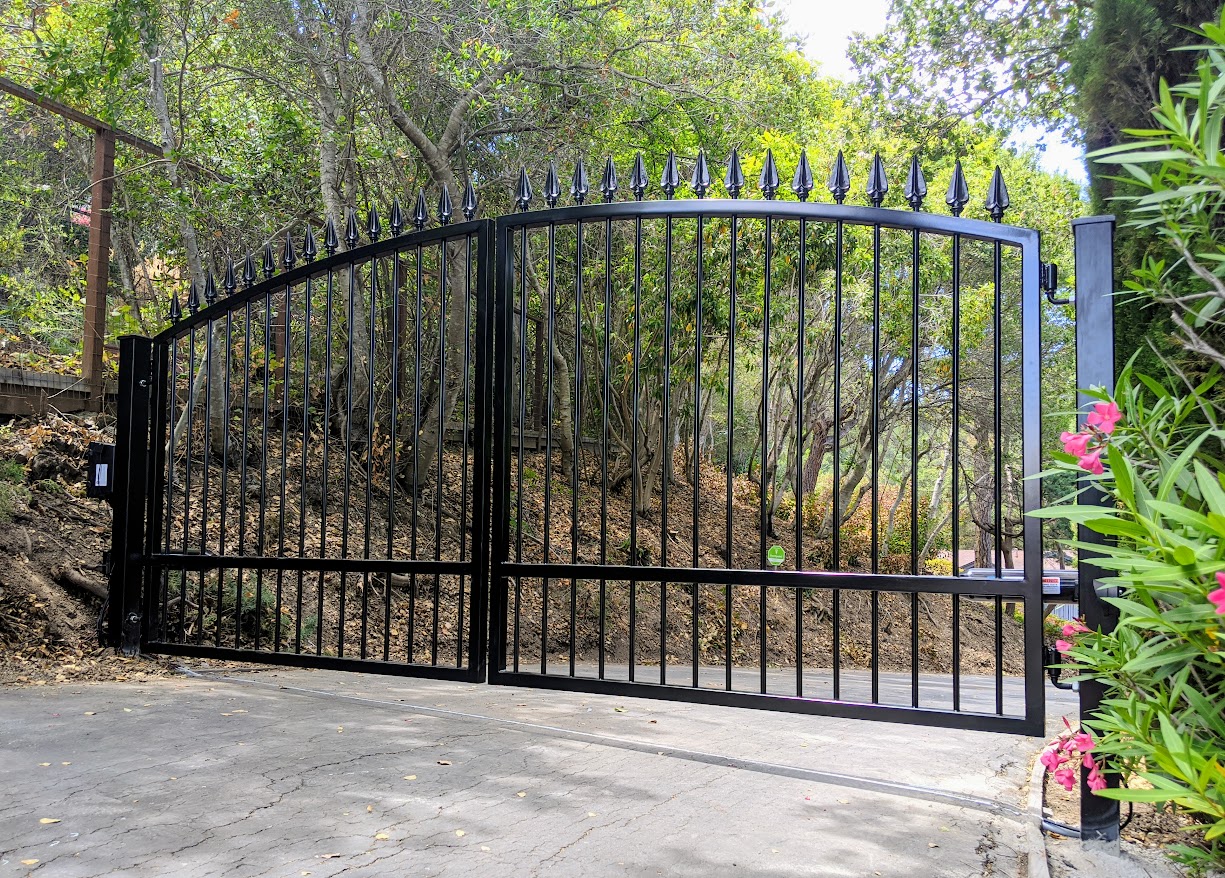
Swing gates are the oldest type. Simple. Reliable. Still the most popular.
Swing Gate: What to Know
Best for: Flat or gentle slope. Under 16 ft wide. Clear space on one or both sides. Two panels with underground opener = cleanest look. No visible motor.
⚠️ Watch out: Not leaving enough room. A 12-ft gate needs 12 ft of empty space to swing. No plants. No cars. No mailbox. On a slope, the gate can hit the ground on the high side.
💡 Pro tip: Swing inward if you can. Keeps the gate off the street. Hides the opener. Looks cleaner. Exception: steep uphill driveways where inward swing drags on the ground.
Gate Type Comparison
Each gate type has trade-offs. Space, slope, and width requirements determine the best fit.
| Factor | Swing | Sliding | Cantilever | Bi-fold |
|---|---|---|---|---|
| Space needed | Full arc radius | Side track run | 1.5× width lateral | Minimal |
| Max width | 20 ft | 40 ft | 60 ft | 30 ft |
| Slope tolerance | Poor | Fair | Excellent | Poor |
| Typical speed | 12-18 sec | 8-14 sec | 8-14 sec | 6-10 sec |
| Maintenance | Low | Medium | Low-Medium | Medium |
Local Considerations for Cupertino
Every market is different. What works in one city may cost more or require different permits in another. Here's the Cupertino breakdown.
State: CA Climate zone: Temperate Permits: Santa Clara County permit; HOA design guidelines common in tech corridor neighborhoods
Cupertino Properties & Styles
Typical lots: Suburban tech corridor lots (5,000-8,000 sq ft typical), HOA communities, established neighborhoods Popular gate styles: Contemporary aluminum and steel, modern minimalist, smart-home compatible gates
HOA & Architectural Review
Heads up: Santa Clara County permit. HOA design guidelines common in tech corridor neighborhoods
Cupertino Cost Factors
Labor and material costs in Cupertino run approximately 20% above the national average. Use this when comparing quotes - a $10,000 gate in Texas might be $12,000–$14,000 in Cupertino.
Local Installer Tip
Cupertino HOAs often have pre-approved gate catalogs. Check before ordering custom designs. Labor costs 25-35% above national average.
What Installers Wish You Knew (Before You Sign)
Methodology note: These tips come from common real-world install patterns. Always double-check local code, utility clearances, and your driveway layout before you start.
💡 Swing Gate (Steel)
Ask for a drip edge on the bottom. It lets water run off. Without it, water pools and rust starts from the inside. A $50 add-on saves thousands later.
Swing Gate Pro Tips
⚠️ Watch out: Not leaving enough room. A 12-ft gate needs 12 ft of empty space to swing. No plants. No cars. No mailbox. On a slope, the gate can hit the ground on the high side.
💡 Pro tip: Swing inward if you can. Keeps the gate off the street. Hides the opener. Looks cleaner. Exception: steep uphill driveways where inward swing drags on the ground.
🏠 Cupertino Installer Tip
Cupertino HOAs often have pre-approved gate catalogs. Check before ordering custom designs. Labor costs 25-35% above national average.
Real Projects: Here's What Actually Happened
Swing Gates in Cupertino: What to Expect
Ideal for: Flat or gentle slope.
Local lot context: Suburban tech corridor lots (5,000-8,000 sq ft typical), HOA communities, established neighborhoods
Avoid this mistake: Not leaving enough room.
Here's Something Cool
Photo eyes and safety edges aren't optional. Skipping one creates a gap in protection.
Recommended Products
Based on this guide, review the most relevant next steps:
See configuration pricing when you're ready to validate dimensions and lead time.
Why GateFrames?
- Nationwide fulfillment process - Projects are delivered across the U.S. with handling options suited to residential sites.
- Instant custom pricing - You can price your gate online right away instead of waiting for a quote.
- 3D model matches your options - You can see your selected setup before buying.
- Install method designed for clarity - Two-person installation path with documented sequencing and support.
- Durable material system - Steel and wood configurations built for long service life with practical maintenance expectations.
- Scope control for custom projects - Complex requests can be quoted with explicit build requirements.
- Support during planning and install - Direct access to help when validating dimensions, hardware, and setup decisions.
- Evidence-led guidance - This blog maps pricing, permitting signals, and installation constraints so buyers can make defensible decisions.
Frequently Asked Questions
How much does gate installation cost in Cupertino? It depends on material, gate type, and opener. See the pricing table above. We adjusted for Cupertino rates.
What space does a swing gate need? Clear space for gate to swing - usually 10-12 ft. Measure before you buy.
What's the biggest mistake with swing gates? Not leaving enough room. A 12-ft gate needs 12 ft of empty space to swing.
Do I need a permit for a driveway gate? Most cities require one. Annoying? Yes. Skippable? No. In Cupertino, santa clara county permit; hoa design guidelines common in tech corridor neighborhoods.
Can I install a gate myself? Manual gates on flat driveways - yes. Automatic gates need wiring. Usually an electrician and permit. Pro install makes sure it meets safety rules.
Get a Gate Scope You Can Actually Execute
Use this guide to shortlist the right configuration, then price it with real dimensions. GateFrames helps you move from research to purchase without guesswork.
- Configured for real driveways - Select gate style, dimensions, and hardware to match your site constraints.
- Instant pricing on custom gates - Most competitors make you click “request a quote.” We show live pricing in our store.
- Live 3D matching model - As you change options, the model updates so you can see what you are buying.
- Nationwide shipping workflow - Delivery options are designed for residential handling, including lift-gate support where available.
- Install clarity before checkout - Step-by-step install sequence and support reduce scope risk for DIY or contractor-led installs.
- Custom request path - If your project goes beyond the configurator, submit requirements in cart and we quote the custom build scope.
Ready to check your exact price now? Open the configurator at GateFrames.com.